
How Automated 3D Rigging Can Improve the Character Creation Pipeline
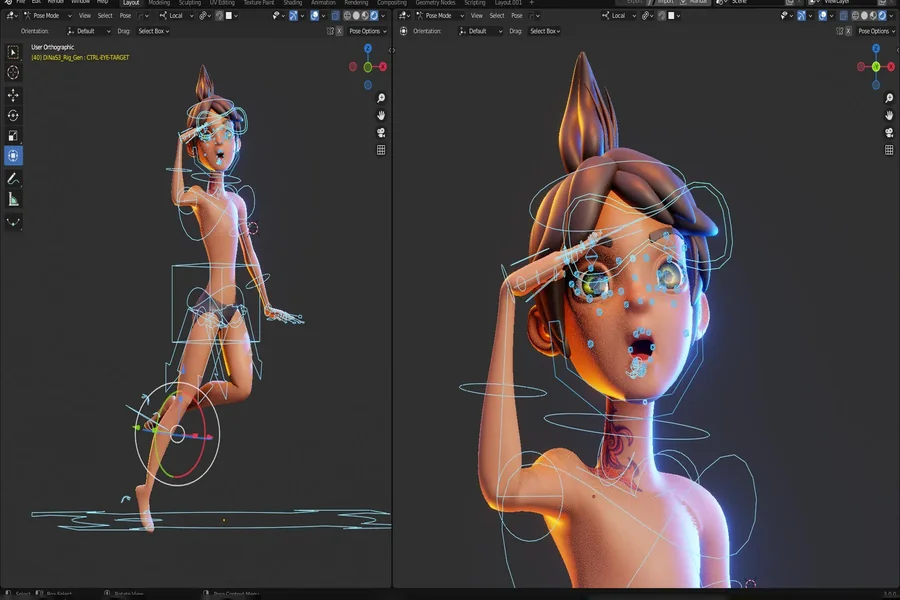
A finished 3D model can be visually complete and still fail during animation. Someone must add bones, skin weights, and usable controls before an animator can pose the character. Manual rigging can take hours when every joint needs individual setup and testing.
Meshy says its auto-rigging system builds a full skeleton hierarchy with skinning weights in about 30 seconds. Its animation workflow also includes more than 600 motion presets for testing character movement inside the platform.
Step 1: Prepare the Model Before Rigging
Good auto-rigging starts with a model that has a clear body structure. You should inspect the mesh before sending it into any automatic rigging system. Joined limbs, hidden geometry, or blocked joints can confuse skeleton placement.
A neutral pose gives the software clearer information about your character. Meshy recommends using a T-pose or A-pose for better rigging results. You can select those poses during generation with Text to 3D, which produces textured models in about one minute.
Before rigging begins, use this checklist to catch common problems:
1.Keep both arms separated from the torso during preparation.
2. Leave enough space between both legs for joint detection.
3. Remove hidden geometry that can interfere with skin weighting.
4. Check clothing near shoulders, hips, knees, and elbows carefully.
5. Confirm your model scale matches the production pipeline requirements.
Step 2: Build a Starting Skeleton Automatically
Automated rigging identifies body regions and assigns a skeleton around them. Modern systems can also calculate starting skin weights without manual weight painting.
Meshy currently supports automatic rigging for humanoid and quadruped characters. It also offers Smart Rig Beta for custom or fantasy creatures that do not fit standard character categories. Its documentation says the system can build the skeleton hierarchy and skinning weights in approximately 30 seconds.
You should treat this first rig as a working draft. Automatic placement can save setup time, but unusual anatomy may still need manual correction. Large wings, extra limbs, long clothing, or extreme proportions can confuse standard skeleton systems.
Step 3: Test Difficult Poses Before Easy Ones
A standing character tells you very little about rig quality. You should test poses that put the most pressure on major joints.
Start with shoulders because raised arms can expose pinching quickly. Deep knee bends can reveal poor weight distribution around hips and thighs. Torso twists can uncover unwanted stretching across the chest and waist.
Use this short test list before approving the rig:
1.Raise both arms fully above the character’s head during testing.
2. Bend each knee into a deep crouching position during testing.
3. Rotate the torso without moving the character’s hips during testing.
4. Test wide steps for stretching around the upper legs.
5. Check hand poses if fingers matter in close shots.
Problems found during these tests are cheaper to repair early. Once animators build many shots, rig changes can affect completed work.
Step 4: Correct Skin Weights Where Viewers Notice Problems
Automatic skinning gives you a starting distribution for bone influence. Difficult areas still need careful review because poor weights can distort the mesh.
Shoulders may pinch when nearby vertices follow the wrong bone. Hips can collapse during wide leg movement for the same reason. Loose garments may also pass through the body during larger poses.
Your technical artist should focus on visible deformation first. Small errors on hidden surfaces may never affect the final shot. A collapsing elbow in a close scene needs immediate correction.
This approach helps your team spend time where viewers will notice problems. You do not need to polish every vertex equally before animation begins.
Step 5: Match Rig Complexity to the Character’s Role
Not every character needs the same rigging depth. Your final camera distance and animation needs should decide how much control gets added.
A background crowd character may only need basic body controls. A lead character may require finger controls, facial systems, and more detailed deformation. Adding unnecessary controls can increase setup work without improving the final scene.
Ask these four questions before expanding the current rig:
1.Will the character speak during close camera shots regularly?
2.Do both hands interact with important objects during animation?
3. Does character clothing require extra bones for controlled movement?
4. Will animators need custom actions beyond standard motion clips?
Meshy provides more than 600 built-in motion presets across walking, running, combat, idle actions, and gestures. Those presets can help you test whether a basic rig already covers your production needs.
Step 6: Test the Character Inside the Real Pipeline
A rig should be tested where your team plans to use it. Previewing inside one tool cannot reveal every issue that may happen after export.
Meshy can export rigged characters in FBX, GLB, or USDZ formats. Its current workflow supports use with Unity, Unreal Engine, Blender, and Maya. Exporting early helps you catch scale, orientation, skeleton, or material problems before final production.
Ask an animator to test a few representative actions after import. A walk cycle can expose foot sliding, while an attack can reveal clipping around nearby props. Early testing gives modeling and rigging teams useful feedback before many scenes depend on the asset.
Why Automation Helps Without Replacing Rigging Skills
Automation can reduce repeated technical work, but production judgment still belongs to artists. BLS counted about 51,900 special effects artists and animators in 2025. The agency projects roughly 4,200 openings each year through 2035.
BLS also notes that artificial intelligence can complete some animation tasks faster. This supports a practical change in how teams may divide production work.
You can let software handle repetitive starting tasks first. Your artists can then spend more time testing deformation and solving scene-specific problems.
Automated rigging works best as an early production tool. It gets your character ready for testing sooner without removing the need for careful review.
Final Thoughts
Automated rigging can remove a major setup barrier from character production. You can reach a working skeleton sooner and test animation before committing many hours.
The best workflow keeps automation focused on repeated setup work. Your team still decides which deformations need correction and how much control each character requires.
A faster starting rig gives you more room for useful testing. Automated rigging can improve the wider character creation pipeline when your team checks every result carefully.