
How to Choose the Right Mattress Manufacturing Equipment for Your Business
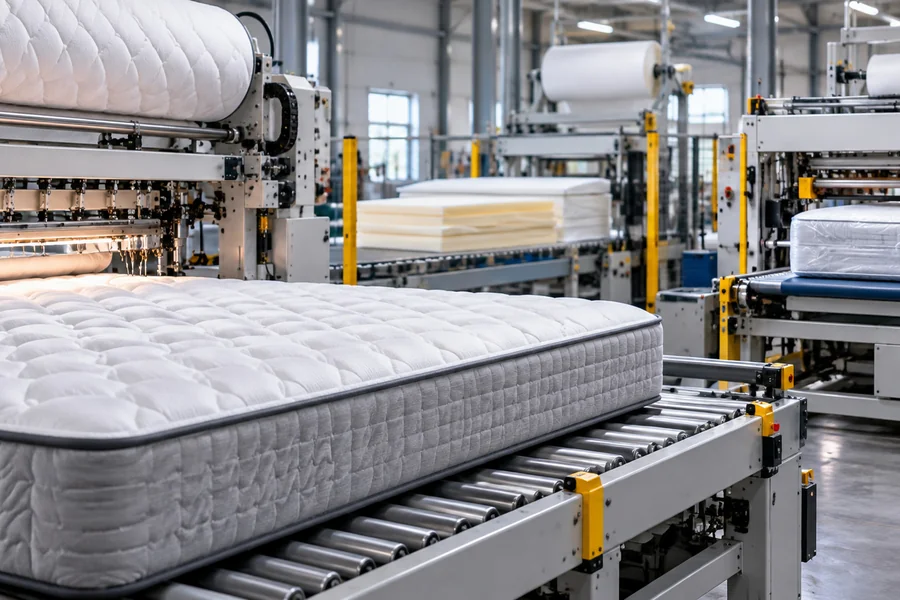
Buying mattress manufacturing equipment is one of the biggest capital decisions a bedding business will make. The machines you choose determine what products you can offer, how consistent your quality is, how many people you need on the floor, and how quickly you can respond to demand. Buy too little and you cap your growth; buy too much, or the wrong type, and you tie up cash in machines that sit idle.
This guide walks through the mattress production process step by step, explains what each stage involves, the challenges that typically arise, and how the right machinery solves them. It closes with a practical framework for making your selection.
Understanding the Mattress Production Process
Mattress making is really several manufacturing processes that converge on one product. A pocket spring mattress involves wire forming, textile work, foam fabrication, adhesive bonding and packaging. A foam or hybrid mattress shifts the weight toward foam cutting and lamination. Your product range decides which production lines you need, so start by mapping the process.
Broadly, production moves through these stages:
- Spring unit production
- Foam preparation and cutting
- Fabric quilting and panel preparation
- Border and panel cutting
- Assembly and lamination
- Closing and edge finishing
- Compression, rolling and packaging
Stage 1: Spring Unit Production
For innerspring and hybrid mattresses, the spring unit is the structural core and the biggest influence on support, durability and feel.
What the stage involves
Steel wire is formed into coils, which are then joined into a unit. There are two main approaches:
- Bonnell and continuous coil units, where coils are interconnected by helical wires or formed from a single continuous wire.
- Pocket spring units, where each coil is enclosed in its own fabric pocket so it compresses independently, giving better contouring and motion isolation.
Challenges
Wire quality and tension control are the biggest issues. Inconsistent coil height or firmness produces uneven mattresses and warranty claims. Pocket spring production also demands precise fabric welding, since weak seams cause pocket failure over time. Changeovers between coil sizes and firmness levels can cost significant downtime.
Machinery that solves it
- Coil forming machines (Bonnell and continuous) automate wire feeding, coiling, knotting and heat-treating at high speed with repeatable geometry.
- Pocket spring machines form, compress, insert and ultrasonically weld pockets in one continuous cycle. Look for models with quick coil-size changeover and the ability to produce zoned or multi-firmness strings.
- Pocket spring assembly machines glue strings together into a finished unit, with programmable layouts for zoned support. Automated assembly removes the labor-intensive and inconsistent manual gluing step.
If spring units are central to your range, this is usually the most capital-intensive and highest-impact part of the line. Some businesses begin by buying springs from a supplier and bring production in-house once volume justifies it.
Stage 2: Foam Preparation and Cutting
What the stage involves
Foam, whether polyurethane, memory foam, latex or gel-infused, arrives as large blocks or buns that must be cut into layers, shaped and sometimes contoured. Precision matters because layer thickness directly affects comfort, and wasted foam is expensive.
Challenges
Material yield is the main concern: poor cutting produces scrap that eats into margin. Dimensional accuracy, clean cut surfaces and handling large, heavy blocks safely are further issues. Contoured and convoluted surfaces are difficult to produce by hand.
Machinery that solves it
- Horizontal foam cutting machines slice blocks into sheets of consistent thickness using a continuous band blade, ideal for high-volume layer production.
- Vertical foam cutting machines trim blocks to length and width and make straight cuts.
- Contour and profile cutters produce egg-crate, wave and zoned surfaces that add comfort features without extra materials.
- CNC and CAD-driven foam cutters cut complex shapes from digital files, which suits custom orders and frequent design changes.
- Foam crushing and rebonding equipment (for businesses that want to recycle scrap) turns offcuts into rebonded foam, improving yield.
Stage 3: Fabric Quilting and Panel Preparation
What the stage involves
The outer fabric is quilted to a thin layer of foam or fibre, producing the soft, padded top and bottom panels that give a mattress its look and first-touch comfort. Quilting patterns are also a major visual differentiator.
Challenges
Pattern consistency, thread breakage, fabric tension and production speed all affect output. Manual or semi-manual quilting limits the complexity of patterns and the reliability of repeat quality. Switching patterns can also be slow.
Machinery that solves it
- Multi-needle quilting machines stitch wide fabric panels at high speed, producing continuous patterns across the full width.
- Computerised quilting machines let operators change patterns digitally in minutes, which is valuable if you offer a varied range or private-label products.
- Chain-stitch versus lock-stitch options give different looks and durability. Chain-stitch is typically faster, while lock-stitch is more secure and resists unravelling.
Selecting a machine with the right needle width, speed and pattern flexibility matters more than top speed alone.
Stage 4: Border and Panel Cutting
What the stage involves
Quilted rolls and border fabric must be cut accurately to the size of each mattress, then sewn into panels and borders.
Challenges
Inaccurate cutting leads to fit problems at closing and wasted fabric. Manual cutting is slow and varies between operators.
Machinery that solves it
- Automatic panel cutters cut quilted material to preset sizes, with sensors for pattern alignment.
- Border cutting and sewing machines prepare side walls, often with handles or ventilation features added.
- Cutting tables with nesting software maximise fabric yield by arranging pieces efficiently.
Automation here reduces waste and speeds up a stage that otherwise creates bottlenecks ahead of assembly.
Stage 5: Assembly and Lamination
What the stage involves
The mattress core is built up. Spring units, foam layers, insulators, padding and comfort layers are stacked and bonded together, typically with adhesive.
Challenges
Adhesive consistency is critical: too little causes layer slippage, too much adds cost and can create hard spots or odour. Alignment of layers matters for the finished shape. Manual spraying also exposes workers to fumes and requires good ventilation.
Machinery that solves it
- Automatic glue spraying systems apply precise, even adhesive coverage and reduce consumption and operator exposure.
- Flame lamination machines bond foam to fabric or other foam using heat rather than liquid adhesive, producing a bond that is flexible and cleaner.
- Hot-melt and water-based adhesive systems offer lower-emission alternatives, which matter increasingly for compliance and environmental claims.
- Layer-stacking and press stations align and compress layers during bonding so units cure square and flat.
Stage 6: Closing and Edge Finishing
What the stage involves
The assembled core is enclosed in its quilted panels and border, and the edges are sewn shut. This step defines the mattress’s visual finish and edge strength.
Challenges
Tape edging requires skilled operators when done manually, and quality varies. Stitching heavy, thick mattresses is physically demanding, and visible flaws in finishing are immediately obvious to customers.
Machinery that solves it
- Tape edge machines sew the panel and border together with a binding tape. Different heads handle different mattress thicknesses, and some models support automated corner handling.
- Flanging machines attach the border flange that holds the panel to the border on pillow-top and flangeless constructions.
- Tufting machines secure layers with fixed ties or buttons through the mattress, which improves layer stability and gives a traditional appearance.
- Handle sewing and label attachment machines automate the finishing details.
Automated tape edge lines can improve consistency and reduce reliance on scarce skilled operators, though many manufacturers keep some manual stations for specialised or premium products.
Stage 7: Compression, Rolling and Packaging
What the stage involves
Increasingly, mattresses are shipped compressed and rolled in a box, especially for e-commerce. Others are packed in protective film or bags for conventional delivery.
Challenges
Compression must be controlled to avoid damaging springs or foam, and the finished roll must be tight enough to ship efficiently. Packaging speed often determines overall throughput, and poor packaging leads to transit damage and returns.
Machinery that solves it
- Mattress compression and rolling machines squeeze foam and hybrid mattresses to a fraction of their size and roll them, ready to bag or box.
- Vacuum packing machines remove air for further size reduction.
- Film wrapping and bagging machines protect mattresses during storage and transport.
- Conveyor and handling systems move mattresses between stages without manual lifting, improving safety and flow.
If you plan to sell direct to consumers, compression equipment is close to essential. Confirm that it suits the construction of your products, since some hybrid designs need gentler handling.
How to Choose: A Practical Framework
With the process mapped out, here is how to approach the purchasing decision.
- Define your product range
Decide whether you are producing innerspring, pocket spring, foam, latex or hybrid mattresses, or a mix. Each demands a different core equipment set. A foam-only operation needs strong cutting, lamination and compression capability but little wire-forming equipment, while a spring-based range puts coil machinery at the centre.
- Estimate your volume honestly
Match machine capacity to realistic demand. Fully automated, high-speed lines pay back through scale, while smaller operations may be better served by semi-automatic machines that cost less and are easier to maintain. Consider forecast growth over several years, and choose equipment that can scale, such as modular lines you can extend.
- Decide on your level of automation
Automation reduces labor, improves consistency and cuts waste, but it costs more and requires technical skills. Weigh this against local labor availability and costs, and your ability to maintain and program the equipment. Many businesses automate the most repetitive, quality-critical steps first, such as quilting, spring assembly and gluing, and keep manual flexibility elsewhere.
- Prioritise flexibility
If you serve custom, private-label or multi-size markets, look for quick changeover, programmable settings and digital pattern or cut files. Flexible machines avoid the cost of constant retooling, which is a hidden drain on productivity.
- Evaluate the total cost of ownership
Purchase price is only part of the picture. Compare energy use, spare parts availability, maintenance requirements, expected downtime, consumables and the training needed for operators. A cheaper machine with poor support can cost more over its lifetime.
- Check supplier reliability and support
Ask about installation, commissioning, operator training, warranty terms and spare parts lead times. Request references from manufacturers of a similar size to yours, and where possible visit a working installation or ask for a live demonstration using your own materials.
- Plan your factory layout
Machines have footprints, ceiling height requirements, power and compressed air needs, and ventilation requirements for adhesive stages. Plan material flow from raw materials to finished goods so your layout avoids unnecessary handling and bottlenecks. A good supplier will help with layout planning.
- Consider safety, compliance and sustainability
Flammability standards, chemical emissions limits and workplace safety regulations vary by market. Choose equipment with appropriate guarding and extraction, and consider lower-emission adhesive systems and scrap-recycling equipment, which can lower costs and support sustainability claims.
Common Mistakes to Avoid
- Buying for peak capacity you may never reach, leaving expensive machines underused.
- Ignoring bottlenecks. A fast quilting machine adds little if panel cutting or closing can’t keep pace. Balance the whole line.
- Underestimating training needs. Advanced machines need skilled operators and maintenance staff.
- Overlooking spare parts and service access, especially for imported equipment.
- Focusing only on price rather than reliability, output quality and support.
Final Thoughts
Choosing mattress manufacturing equipment is about fitting the right machines to your products, volumes and business strategy, not chasing the most advanced or cheapest option. Understand each stage of the process, identify where your biggest quality, labor or waste problems lie, and invest first where automation delivers the greatest return. Work with suppliers who offer proven machinery and real support, and build a line that can grow with you.
Done well, the right equipment will improve consistency, lower costs per mattress and give you the flexibility to compete in a market where customers expect both quality and variety.